
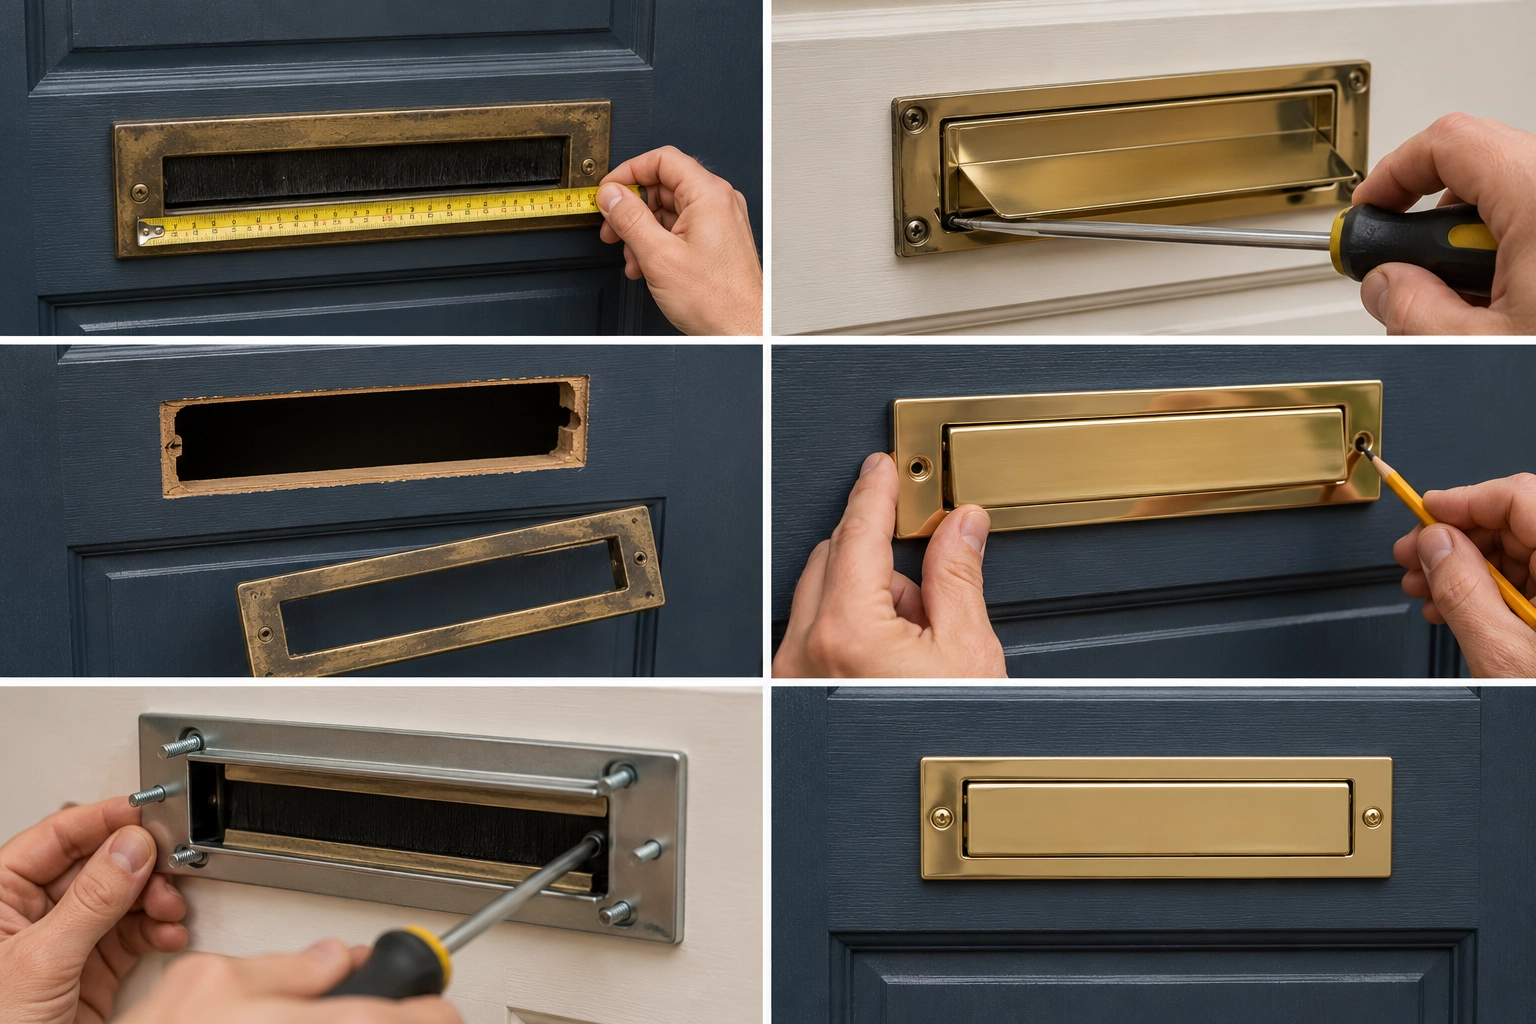
Replacing a letter plate is a satisfying half-hour job that makes an immediate difference to how a front door looks. Whether the existing one is scratched, discoloured, rattling on cold evenings or simply out of keeping with the style of the door, a new letter plate is one of the quickest front-door upgrades you can make.
This guide takes you through the process step by step.
What you will need
- A flat-head screwdriver
- A Phillips screwdriver
- A tape measure
- A pencil
- Optionally, a jigsaw or padsaw if enlarging the slot
Step 1: Measure the existing letter plate slot
Before removing the old letter plate, measure the slot in the door: its width and height. Most standard letter plate slots are around 250mm wide and 40mm high, but there is variation. Your new letter plate needs to cover the slot or match it closely. Note the measurements down before you order.
Step 2: Remove the old letter plate
Letter plates are usually fixed from inside the door with two or four bolts that pass through the door thickness and screw into the back of the face plate. Open the door and look at the inside surface. You should see a flap (the draught excluder) and, above or below it, the bolt heads or screws that hold the plate in place.
Unscrew these fixings while holding the face plate on the outside to stop it from dropping. Once all the fixings are removed, the plate will come away from both sides.
Step 3: Check the slot and clean up
With the old plate removed, check the condition of the slot edges. If the timber is in good condition you can fit the new plate directly. If the slot edges are splintered or the paint around them is chipped, take a few minutes to sand them smooth before fitting. This is also the time to check whether the new letter plate is a close enough match to the slot size to cover any imperfections.
Step 4: Offer up the new plate and mark the fixings
Hold the new letter plate against the outside of the door, centred over the slot. Use a pencil to mark the fixing hole positions through the mounting holes on the plate. If the new plate uses the same fixing positions as the old one, you may be able to use the existing holes.
Step 5: Drill and fit
Drill through at the marked positions, making sure to go straight through the door and not at an angle. The fixings for most letter plates are long machine screws that pass through the door and tighten against the inside plate. Feed the screws through from the outside face, then thread the inside plate or escutcheon onto the screws from inside and tighten up evenly.
Do not overtighten. The plate needs to sit firmly but crushing the door material will not add any extra security and can cause the timber to split around the fixings.
Step 6: Test the flap
Open and close the letter plate flap a few times. It should move freely and close completely. If it is stiff, check that the fixings are not overtightened on the hinge side. If the draught excluder brush is folding inward rather than sitting neatly against the flap, tuck it back into position and check the flap alignment.
Completing the front door look
A new letter plate often highlights how the rest of the front door furniture compares. If the door knocker, numerals or handle look dated or a different finish, this is a natural point to update them at the same time.
We have a full range of letter plates in a range of finishes including antique brass, polished chrome, satin nickel and matt black. Matching door knockers and door numerals are available in the same finish families, so it is straightforward to create a complete, cohesive front door set.
A matching set of letter plate, knocker and numerals is one of the simplest ways to lift the kerb appeal of a front door without any major work, and it ties in naturally with the rest of the door hardware.